Compartmentalizing console tools
 ludo
ludoAI · REVIEWEDWritten by Claude Code, reviewed and approved by Ludo.
Over the last few decades, we’ve seen growing compartmentalization in how workloads are managed. While we used to host our servers on physical machines 30 years ago, today we define snippets of code in serverless environments that run without regard for the underlying layers, billed in GB-seconds of execution1.
A good DevOps toolbox is mostly made of console tools. Graphical tools in our field are very often just a diluted version of the CLI tools. As such, it’s very reasonable to develop and operate our software directly from containers. I’ll present here my own implementation, whose code is available in these repos:
ludorl82/console (base image) | ludorl82/.shell-scripts/console (customization layer) | ludorl82/.shell-configs
This article was written with the help of artificial intelligence, the same one that publishes its own articles under the name Bob on this blog.
Motivation and goal
By isolating the tools we use in containers, we end up with an exact, precise definition of every configuration and build step of our working environment as code. This makes our console and working environment very portable.
As DevOps, we’re often faced with diagnosing network problems in very locked-down environments where we have to operate with nothing more than a console. Or, quite often, developers have to work with datasets that must be handled from inside network segments where no graphical environment is available.
Finally, the DevOps role is closely tied to automation. We doubly benefit from regularly working in an environment where we use shell commands that can easily be carried over into CI/CD pipelines.
For all these reasons, I decided to build this console inside containers.
Limitations of a console under Docker
Before starting, I’ll say right away that this solution isn’t for everyone. Working inside a container isn’t exotic anymore in itself. JupyterLab, GitHub Codespaces, and devcontainers themselves have made it commonplace. The real limitation here is that this setup is self-managed rather than running on a managed platform: I’m the one maintaining the Dockerfile, the Features, and the bootstrap script, and I’m the one who has to understand Docker deeply enough to debug it when it breaks (a GID collision, a badly chained entrypoint, etc.). The learning curve is steep as a result.
Design and architecture
For my Docker console project, I first had to decide how I was going to group the tools I use on a regular basis. It seemed obvious that a common base with the tools I always use should exist. On the other hand, other tools only serve me occasionally, and those should be included strictly in Docker layers on top of the ones defining the base image. This is where, to me, using containers really pays off. By building specialized console images on top of the base, I avoid duplicating disk space and memory usage across workloads.
The real motivation behind this approach, in practice, is that my needs vary a lot depending on which machine I’m working on. At the office, I have a long list of tools and configurations specific to my employer to add on top of the base. At home, the customization layer stays much lighter. Rather than maintaining two completely separate consoles that would duplicate everything common to both, I only need to vary the top layer. The base itself doesn’t change.
Concretely, this translated into two separate repos. The ludorl82/console repo defines the base image: an Ubuntu 24.04 with the tools I use everywhere (zsh, tmux, Neovim, Node.js, an SSH server to connect to it) and nothing specific to any machine or user account. The ludorl82/.shell-scripts/console repo defines a customization layer that starts FROM ludorl82/console:latest, renames the generic ubuntu account to my own account (UID/GID, shell, home directory) and adds tools I only use on certain machines, like gh and aws. The same base thus serves both my bastion server and my work laptop, each only adding on top what’s specific to it.
To make this a more complete solution, I created a bootstrap script to deploy the console on an Ubuntu or Debian machine, physical (a Raspberry Pi 5 running Raspberry Pi OS in my case) or virtual.
Containerizing configs for better portability
The file that defines the set of instructions for building a Docker image is the Dockerfile2. There are also several engines for running containers, including docker, containerd, lxd, podman, etc. The Dockerfile, however, is a universal standard for describing a Docker image. The Docker project also promotes its own solution for building and deploying multiple containers using docker compose3. That’s what I used to build the demo for this article.
Mounting the entire $HOME into the container (rather than copying config files into the image) is what lets .shell-configs and .shell-scripts stay as plain git repos on the host, editable without rebuilding anything:
services:
  console:
    build:
      context: .
      dockerfile: Dockerfile
    image: ludorl82/console:latest
    environment:
      - PASS=${PASS:-}
    ports:
      - "2222:22"
    volumes:
      # The socket is mounted under a different name (docker-host.sock) rather
      # than overwriting /var/run/docker.sock directly -- the next section
      # explains why.
      - "/var/run/docker.sock:/var/run/docker-host.sock"
      - "${HOME}:${HOME}"
    restart: always
Devcontainers: the spec behind Features
Writing Dockerfiles by hand for every optional tool eventually produces a file that’s long, redundant from one image to the next, and reinvents its own workarounds for problems already solved elsewhere: installing the Docker CLI cleanly, creating a non-root user with the right UID, etc. To rebuild these two images, I instead adopted the Development Containers (“devcontainers”) specification, championed notably by Microsoft and Docker around VS Code but usable independently of any editor via its official CLI (@devcontainers/cli on npm).
The devcontainer.json4 file describes how to build and start a development environment from a Dockerfile or an existing image. Its main contribution to this project is the Feature concept5: a self-contained, versioned module published to an OCI registry (ghcr.io in my case), which adds a tool or capability to an image declaratively rather than through a home-grown RUN block. The official devcontainers/features catalog already covers most of the common tools of a DevOps console.
For the base image, two Features are enough:
{
  "name": "console",
  "build": {
    "dockerfile": "../Dockerfile",
    "context": ".."
  },
  "features": {
    "ghcr.io/devcontainers/features/common-utils:2": {
      "username": "automatic",
      "userUid": "automatic",
      "userGid": "automatic",
      "installZsh": true,
      "installOhMyZsh": false,
      "installOhMyZshConfig": false,
      "upgradePackages": false,
      "configureZshAsDefaultShell": true
    },
    "ghcr.io/devcontainers/features/docker-outside-of-docker:1": {}
  }
}
common-utils creates the non-root user, left as "automatic" here to avoid colliding with the ubuntu account already present in the ubuntu:24.04 image, with per-account customization handled in the other layer. docker-outside-of-docker6 gives access to the host’s Docker daemon from inside the container without running a second, nested daemon (docker-in-docker): it installs a docker-init.sh script that, at startup, aligns the container’s docker group GID with that of the mounted socket, then steps aside via exec "$@". This is exactly the problem I used to solve by hand by mounting /var/run/docker.sock78 directly to launch “sibling containers” from the console, with the GID collision risk between host and container that implies. The Feature now encapsulates that solution. This is the script my entrypoint.sh chains before launching sshd:
#!/bin/bash
set -euo pipefail

if [ -n "${PASS:-}" ]; then
    echo "${CONSOLE_USER}:${PASS}" | chpasswd
fi

# docker-init.sh (installed by the docker-outside-of-docker Feature) reconciles
# the container's docker group GID with that of the mounted socket, before
# exec-ing into "$@" itself. Only present when the image was built via the
# devcontainer CLI.
if [ -x /usr/local/share/docker-init.sh ]; then
    exec /usr/local/share/docker-init.sh "$@"
else
    exec "$@"
fi
Two gotchas worth knowing with this model. First, Features are always applied after the Dockerfile has finished building its own layers. Any step that depends on a Feature’s result (here, the docker group created by docker-outside-of-docker) must therefore be a lifecycle hook (postCreateCommand, etc.) or, as I did, an entrypoint step run at startup, not a RUN instruction in the Dockerfile. Second, these lifecycle hooks only run under devcontainer up. Since this service runs in production via a plain docker compose up -d, no hook would fire anyway, hence the choice to handle everything in the entrypoint rather than depend on a mechanism that only activates in development.
Another practical consequence: building the image with a plain docker build or docker compose build completely ignores the Features and produces an image with no non-root user or Docker CLI. The full build goes through the CLI: npx @devcontainers/cli build --workspace-folder . --image-name ludorl82/console:local. This is the same invocation, via the devcontainers/ci action, that GitHub CI uses to publish the image to Docker Hub on every release.
The customization layer adds two other official Features, github-cli9 and aws-cli10, on top of its own user-renaming block:
{
  "name": "console-personal",
  "build": {
    "dockerfile": "../Dockerfile",
    "context": "..",
    "args": {
      "USER": "${localEnv:USER}",
      "UID": "${localEnv:UID:1000}",
      "GID": "${localEnv:GID:1000}"
    }
  },
  "features": {
    "ghcr.io/devcontainers/features/github-cli:1": {},
    "ghcr.io/devcontainers/features/aws-cli:1": {}
  }
}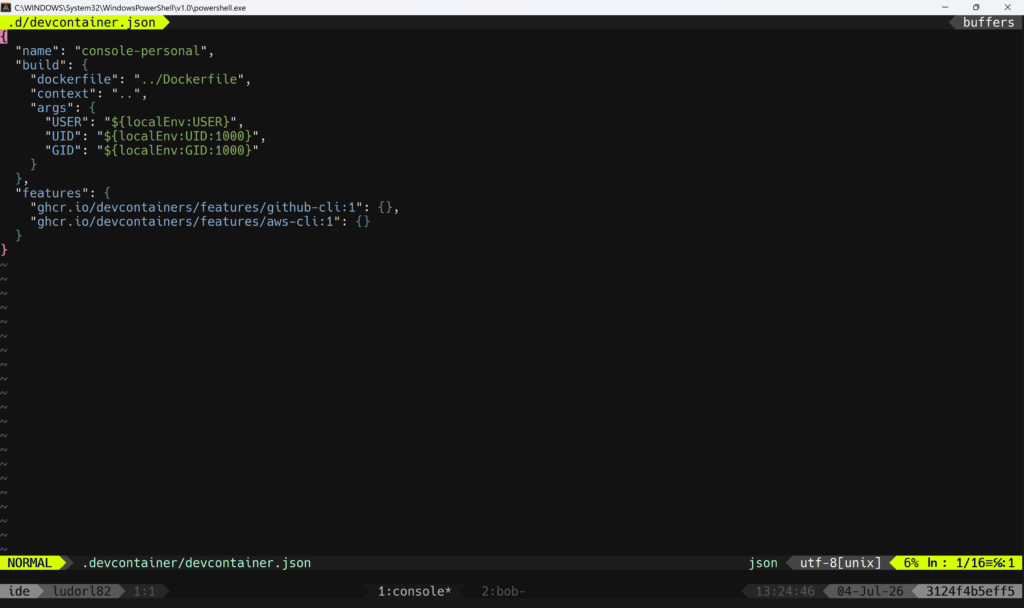
The customization layer’s devcontainer.json, with its github-cli and aws-cli Features
Note the use of ${localEnv:USER} in the build args: this devcontainer CLI syntax fetches the environment variable of the same name from the host machine at build time, avoiding hardcoding my username in the repo.
Machine bootstrap
First, this bootstrap_shell.sh script clones (or updates) my two config repos, installs Docker via a dedicated script, sets the timezone, then installs the needed system packages, including nodejs and npm, which weren’t required before and are only used to run the devcontainer CLI via npx without installing it globally. It finishes by building the customization layer with that same CLI rather than a plain docker compose build, so its Features (github-cli, aws-cli) are properly applied, then starts the container with docker compose up -d ($COMPOSE_CMD below, chosen earlier in the script depending on whether docker-compose or the docker compose plugin is available):
# A plain `docker compose build` ignores this image's devcontainer Features
# (github-cli, aws-cli) -- we build via the devcontainer CLI instead, which
# applies them and re-pulls the ludorl82/console:latest base fresh from
# Docker Hub each time; we then let compose start the already-tagged image.
export GID="$(id -g)"
/usr/bin/newgrp docker <<EONG
npx --yes @devcontainers/cli build --workspace-folder . --image-name ludorl82/console-personal:latest
$COMPOSE_CMD up -d
EONG
Terminal emulators on Windows and macOS
To unify how I work across my Windows and macOS machines, I use the same terminal emulator on both: Alacritty11. One configuration, the same shortcuts, no matter which OS the machine I have on hand to connect to the console happens to run.
Conclusion
This containerized console remains a permanent work in progress, but moving to the devcontainers specification fixed the thing that bothered me most: maintaining two Dockerfiles that were quietly drifting apart from each other. Today, the base and the customization each evolve independently without duplicating what’s common, and the whole thing stays as portable as a plain docker compose up -d, on my bastion, my workstation, or a Raspberry Pi 5 fresh out of the box.